Women’s Peaked Hat Challenge
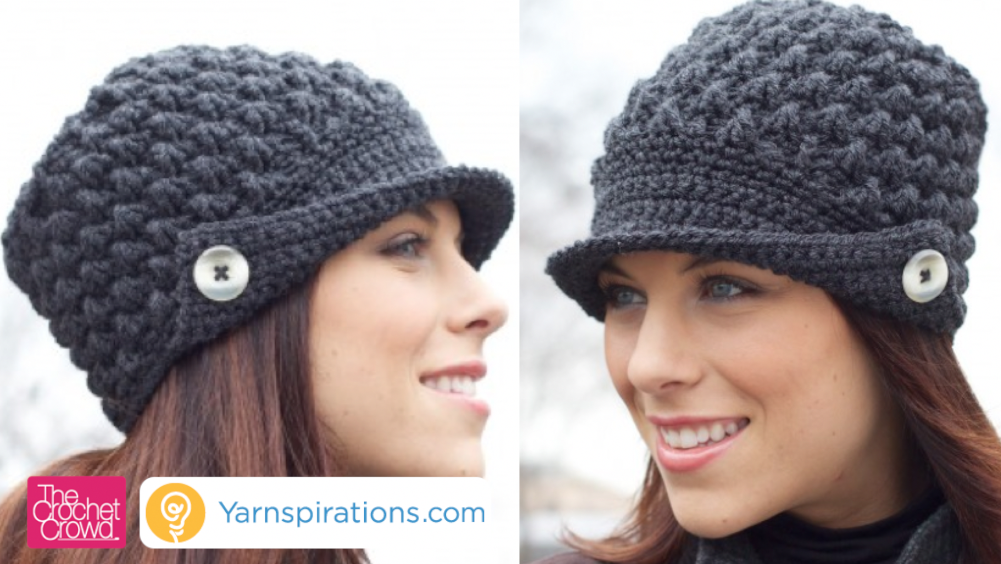
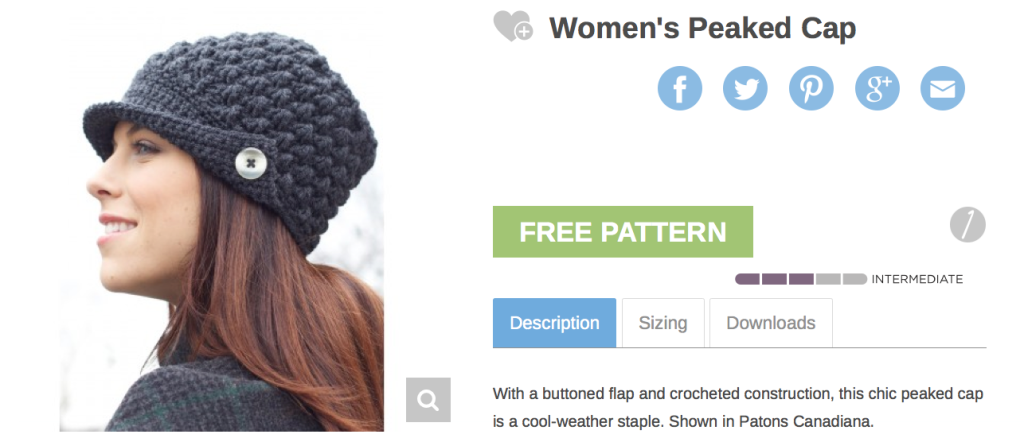
Women’s Peaked Hat
This Challenge is Now Over. Thanks to all who submitted their hats. We received 4,409 entries for this challenge.
Challenge is from January 1 – 31, 2015. Ending at 11:00 pm on January 31, 2015, Eastern Standard Time.
The challenge will help beat the cold winter. It will also make for a great project to make for gift giving and charity causes.
Challenge Goals
- Learn a New Stitch Technique
- Learn How to Create a Visor
- Use Buttons to Embellish Your Work
- Create Opportunities for Gift Giving and Charitable Donations of the Finished Hat
One lucky winner will be selected to receive a Yarnspirations Gift Pack, value $100 + Crochet Crowd Gifts.
Materials List
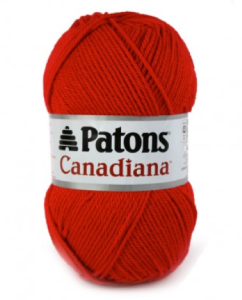
- 2 Skeins (if wanting a solid colour project) OR 5 Skeins of Different Colours (if you want to play with colour for a unique looking project) of Patons Canadiana Yarn, 3.5 oz / 100 g: 205 yds / 187 m. Learn more About This Yarn and/or order online.
- Size H/8 or 5.0 mm Crochet Hook
- 2 – 1″ fancy buttons to go with the colour you decide. You can change the size of the buttons if you cannot find 2 – 1″ buttons that you like. The finished project must have buttons to qualify.
- Needle and thread to fasten buttons to project.
For this challenge, you are given 3 options to be able to follow the pattern. This will allow everyone to be successful. This is a intermediate level project.
- Written Instructions
- Crochet Diagram
- Video Tutorial
Increasing the Size – NOT IN PATTERN
Some crocheters are experiencing a sizing issue. If your hat is appearing too small by the time you finish round 8. I am going to give you two additional rounds to follow to increase the diameter of the hat by 2″.
My advice will put 4 DC’s between each spoke instead of just 3. It will make a significant difference.
ROUND 9 – Ch 2, *1 dcfp around next dcfp. 1 DC into the next 3 dc, 1 dcfp, 2 dc into next dc and then 1 dc into the next 2. Repeat from * AROUND
Round 10 – Ch 2, *1 dcfp around next dcfp. 2 DC into the next dc, 1 dc into the next 2 dc, 1 dcfp, 1 dc into next 4 dc. Repeat from * AROUND
Once you get this done…resume the pattern as normal starting at Round 9 as per the pattern.
Free Pattern
Video Tutorials
General Guidelines
- Each completed project you do is an entry. You are welcome to submit as many completed projects as you like. If your projects are all the same colour/design, you must take a group photo to prove there is a multiple as each hat qualifies as an entry.
- Suggested Yarn is Patons Canadiana; however, you may substitute your yarn to make this project. Review the Patons Canadian information on Yarnspirations.com to determine substitution if required.
- You can choose any colours you wish and you can mix and match your yarns. Project can be done in solid or mixed colours.
- The pattern must be followed completely which also includes the buttons on the side of the hats. Extra embellishments can be added to the project after the main project is completed.
- You can change the button sizes if you prefer. Keep in mind the finished project needs to have buttons to qualify for the entry.
- There is no advance sign up required.
- The challenge is open to all fans of The Crochet Crowd. There are no restrictions of country of origin associated this challenge.
- The draw at the end is random to be fair to all challengers.
Standard Guidelines
- There is no sign up required to participate. Complete the project and submit your photo when you are done. This challenge is open to fans of The Crochet Crowd. There are no restrictions of country origin associated to our challenges.
- You may use any yarn you wish. You may substitute your yarn for any brand or colors that you desire. You may create any color scheme
- You may do as many projects as you wish. Each submitted project is considered a separate entry. If multiple entries are identical, a picture showing the projects together to prove their are multiple must be included with your submissions.
- We require your photo to show the entire project so we know the entire project is done. The project photo must be showing all of the project for us to examine it’s completion. Ensure your project is completely finished with yarn tails and etc not showing. It’s like giving it out as a gift, we want to the see the photo showing as if you were gifting us the finished product. We will then know you are completely done.
This is intended for a fun community challenge only. We each are deserving of the highest praise possible for our own creativity. Let’s have fun.
How To Submit Your Photo
Submitting for the Crochet Crowd Challenge is really easy.
Please email your photo to:
MikeysHelpDesk@hotmail.com
- Please use Subject Title: Hat
- You must include your name and full mailing address to qualify.
- Attach your photo(s).
If you have forgotten to include your name and address in your email and have to resend, you must send in your photo again with your new email.
Give us a 3 day window to review and enter your photo into our challenge. Do not resubmit. We do not acknowledge the arrivals of each email, but you may check our assigned gallery for this draw to ensure we have received it. The galleries are in alphabetical order by the name you gave us.
To avoid your email from being misdirected and hitting our junk box. You must use the subject title. We are not responsible for emails that are misdirected as a result of a submission not following this procedure. To protect our servers, we delete any emails that arrive that have no subject title to prevent malware and virus programs from our systems.
View The Submissions Gallery Sent In By Challengers
- Photo will be checked to verify it meets the challenge requirements.
- All photos must be submitted during the challenge time frame only to be eligible for the prize giveaways. Entries after this due date will be accepted for our gallery but there are no prize giveaways after the deadline. We are firm on deadlines and do not offer extensions to be fair to everyone who has submitted on time.
- When you email your finished photo to us, we respect your privacy and will only post your first and last name on the picture in our gallery with the photo so we can identify the winner at the end.
- Posting your photos to our Facebook Wall doesn’t count as an entry. You must send it to us in the form above for us to review.
- We may feature the submitted photos in our social media such as Facebook, newsletters and/or website.
- We will not switch the photo if you are unhappy with how it looks in the gallery, please ensure it’s the photo you definitely want featured is the only one sent.
- Your emails are kept on file for the duration of the challenge and then deleted afterwards. We do not add your email to our newsletter lists.
- Due to the countless technology platforms and services, we are not responsible for any of our challengers if a mobile devices or technology that isn’t compliant to being able to read our website, view our videos and/or get access to the free patterns.
- Please verify your entry is in our gallery prior to our draw. We need up to 3 days to get your entry into our gallery. We upload it ourselves as part of our review process. If you do not see your entry, we most likely haven’t received your email. Do not wait until after the draw to check if your entry is in.
- We are not responsible for any emails that are not delivered to us before the due date.
Show’n Tell on Facebook
- Show’n Tell: Post your finished project on The Crochet Crowd Facebook Page to show everyone your finished work so we can drool over your creativity.
- Featuring on Facebook is dependent on you. We do not upload your emailed photos to Facebook. You have to do that yourself if you want to Show N Tell your creativity.

I followed the pattern as is and it turned out fine. I did use the YouTube tutorial on how to read a charted pattern and that really really really helps. I have in fact have learned that I prefer a pattern that is charted versus just written.
I don’t know who put this pattern together, but it was a complete disaster. I’m a pretty good crocheter and it appears that in order for this hat to turn out right, you have to adjust the pattern yourself. Following the pattern exactly as is, the hat would be sized for a small child. By the way, I used the yarn called for in the pattern and went up a needle size. I was beginning to hate the hat until I decided to my certain adjustments.
I used regular yarn (actually a value pack called craftsmart) from Michaels. I did not have to adjust the pattern and it came out beautifully. Thanks Mikey.
Even the change in the instructions on how to increase didn’t work after those two rows were added, so many of us added more “spokes” in the beginning of the pattern. Before that I was using a larger hook.
Where does the winning name get posted. I haven’t seen it anywhere.
Pingback: Year Of New Beginnings 2015 | Vagabon Velda's
Pingback: Shoulds and dids | Kids by hand
Who won? Haven’t seen post or missed it thanks
Help..if I used the instructions for increasing the two rows…how do I make up for this in row eleven twelve?
Hi Mikey my name is Mildred I just wanted to thank you for that beautiful page I made the hat and it came out beautiful so now I’m going to make them to raise some money to help my brother in Puerto Rico my sister in law had lung cancer stage 4 and they are going to a very critical situation so I’m going to try helping by making hat with the colors of the different cancers ones again thank you you are awesome God bless you and Diva Dan
Hi Mikey,
I made it my two big hat that I increased the size. I love the Hat!!
Pingback: Crochet Challenge: 2 more! | Sparkle & Doom Designs
This pattern is irritating. It really should of been tried out more. The directions lack clarity etc., but I so like the pattern. Was making it for my mom (90), but it just won’t turn out right.
This is not working out for me with a 4ply yarn. (US). My project looks no where as heavy and nice as the shown pattern pic.
Pingback: Left Hand: Women’s Crochet Peaked Hat Challenge | Hobi ve El İşi Dünyası
Pingback: Crochet Crowd Women's Peaked Hat - Pops de Milk
I found a way to increase the size of the peaked hat that allows you to stay in pattern. I simply increased the first row by one DC. that ends up giving you 18 spokes? instead of the sixteen in the pattern. At the end of the increases you will have 72 stitches instead of 64. You will have to adjust the brim by increasing the length a bit. Hope this helps. I know other people were struggling with this.
This is my 1st challenge. 1st had came out only fitting as 2yr old. After reading all the comments about sizing issues an some people debating where to put the extra stitches in from round 10. I decided on doing my increase at the beginning. I did 9 DC instead of 7. Continue as pattern but stitch count higher at end of each round, by end of round 8 you end up with 80 just the same as the other increase but it lines up with spokes
I was happy to see the increase rounds, but then nothings says how to work the remaining rounds with the extra stitches. Very confusing.